SmartMoto Mobile Service Software Flash/Repair Manual
Download PDF English or Italian version of User's Manual for SmartMoto v.1.23 and lower.
SmartMoto is a flashing, repairing and unlocking software meant to be used with Smart-Clip and S-Card dongle. Free of charge download of SmartMoto is available at our web site.
  
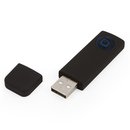
S-Card, Smart-Clip + SmartMoto
As soon as S-Card dongle and Smart-Clip are connected to PC, SmartMoto is ready to operate.
Before starting SmartMoto, please set the compatibility for corresponding Operating System (right click on SM.exe file and choose Properties > Compatibility…)
To run SmartMoto under Win2000/XP and to update Smart-Clip, please launch SM, open bookmark "Smart –Clip" and tick the option "Disable OS parallel port polling (requires reboot)".
After that – PC requires to be restarted.
Flash file formats
SmartMoto supports 4 flash file formats: *.mfw, *.mbk, *.smf, *.smb . No other formats will be compatible.
*.mfw - are meant to be used when the handset is connected to PC via Smart-Clip
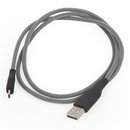
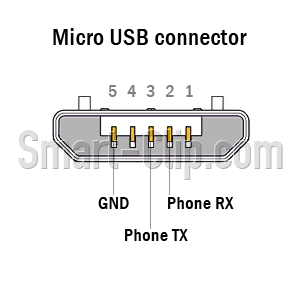
- Connect handset to PC via Smart-Clip (
phone > USB cable > Smart-Clip > LPT cable (or Smart Adaptor) > PC).
- Connect S-Card to PC USB port.
- Connect power supply to Smart-Clip and power on the handset.
- Launch SmartMoto.
- Choose "Smart-Clip USB port" in phone connection field.
- Press "Search". Software should perform the following steps:
- SmartMoto detects S-Card;
- SmartMoto detects Smart-Clip;
- SmartMoto detects the handset and reads phone information.
- Log to bookmark "Flash".
- Press "Browse" to select the flash file.
- Press "Write flash".
- Message "Flash completed" appears at the end of the process.
After successful flashing is recommended to perform Master Reset and Master Clear procedure form the phone's menu.
There are 3 types of *.mfw flash files
- reflash.mfw - meant to be used for upgrade of software. No data will be lost from the phone. Other words, all downloaded pictures, ring tones, contacts won't be erased from the handset memory.
- flash_flex.mfw - meant to be used for upgrade of software with change of flex (change of basic setting, e.g. working frequency band). Some data could be lost from the phone's memory after flashing.
- full_flash.mfw - complete change of firmware including the EEPROM. All added data will be erased from the memory.
Flash options
Force simple write mode (slower)
Sometimes during work with different types of flash memory chips, Block record method does not work.
In this case it's possible to work with slower but easier and more reliable flashing method - "word" flashing method. Such method takes up to 3-4 times longer to flash, but allows to work with wider variety of microchips. We recommend using this method in case of problems with block method.
Overwrite boot area
This option is required for flashing the handset with full_flash.mfw file while boot core has to be repaired or changed (downgraded).
Skip firmware mismatch confirmation
In some cases, the handset can be flashed with higher lang_pack version that differs from the original phone firmware. This option allows to avoid the firmware check. (Recommended for advanced users only!)
Turn phone off after flashing
This option allows the SmartMoto turning the handset off right after the flash process finished.
Check IMEI veracity
This option is ticked off by default. It allows you to check whether software IMEI was patched by third-party software.
Phone MCU boost mode
Allows you to accelerate execution of operations in the phone.
Force simple mode (slower)
Certain flash memory chips have issues with block programming method. In this case it's possible to work with slower and more reliable flashing method - "word" flashing method. Such method takes up to 3-4 times longer to flash, but allows to work with wider variety of microchips. We recommend using this method in case of problems with block method.
Smart write (faster)
With this option flashing process is accelerated by avoiding reprogramming if the data to be programmed matches the existing data.
Save FFS to backup
allows you to save full phone’s file system in the backup file (phone book, messages, user code etc)
Write full raw backup
With this option you can restore full backup (with user’s file zone) which was saved with “safe ffs to backup” option
Work with secondary IMEI
Switch between primary and secondary IMEI when serving double-SIM phones (Reading codes, Repair IMEI)
Upgrade firmware
This option allows you to work with “CUST PARA” area in the firmware. If "Upgrade firmware" option is active, then "CUST PARA" area will be preserved (i.e. backed up and restored after flashing), so phone will use that data. If "Upgrade firmware" option is inactive, this area will NOT be preserved, and the phone will use default data. Note that options "Upgrade firmware" and "Write full raw backup" are mutually exclusive.
Full Flash backup
*.mbk - flash backup created with Smart-Clip, S-Card together with SmartMoto.
- Connect handset to PC via Smart-Clip (
phone > USB cable > Smart-Clip > LPT cable > PC).
- Connect S-Card to PC USB port.
- Connect power supply to Smart-Clip and power on the handset.
- Launch SmartMoto.
- Choose "Smart-Clip USB port" in phone connection field.
- Press "Search". Software should perform the following steps:
- SmartMoto detects S-Card;
- SmartMoto detects Smart-Clip;
- SmartMoto detects the handset and reads phone information.
- Log to bookmark "Backup".
- Press "Backup phone flash".
- Select the location for the file to be saved.
- Message "file.mbk saved" appears when the process is completed.
The handset can be also flashed with a file backed up from another phone. In some models security zone will get backed up automatically with the flash file. In this case, after flashing the phone the original security area has to be restored:
- Connect handset to PC via Smart-Clip (
phone > USB cable > Smart-Clip > LPT cable > PC).
- Connect S-Card to PC USB port.
- Connect power supply to Smart-Clip and power on the handset.
- Launch SmartMoto.
- Choose "Smart-Clip USB port" in phone connection field.
- Press "Search". Software should perform the following steps:
- SmartMoto detects S-Card;
- SmartMoto detects Smart-Clip;
- SmartMoto detects the handset and reads phone information.
- Log to bookmark "Backup".
- Press "Browse" to select the flash backup created from another handset.
- Press "Restore phone flash".
- Wait until the process completes.
- Press "Browse" button again.
- Select the original PDS backup (can be recognized by phone’s IMEI).
- Press "Restore security area".
- The handset is ready for operation.
After successful flashing is recommended to perform Master Reset and Master Clear procedure form the phone's menu.
Note
To perform Save/Restore Backup process some phone models with higher boot versions might require TestPoint connection method or the Prepare cycle to be performed. To get more detailed information, please log to UNLOCK manual.
In any case do not overwrite security area with the security file from another handset.
We strictly recommend not to flash the phones with backup flash files received from other phones in these models: C975, C980, V975, V980, E1000, A1000, V1050. We would urge everyone to use the latest version of SmartMoto and to flash the handsets only with files downloaded from our website. This does not apply to the backed up language packs.
Please, create a backup of the full flash before actual flashing. So, in case of the wrong flashing the handset can be restored to its original state.
Backup files (*.mbk) are created only for the Clip that they were made with.
It’s not possible to use "restore" feature with the backup file made by any other Clip.
In case of creating a backup of language pack, file will be saved in *.mfw format and won’t be bound to Smart-Clip hardware.
Backup of language pack
This option allows creating a copy of language package only, when the full backup is not required.
- Connect handset to PC via Smart-Clip (
phone > USB cable > Smart-Clip > LPT cable > PC).
- Connect S-Card to PC USB port.
- Connect power supply to Smart-Clip and power on the handset.
- Launch SmartMoto.
- Choose "Smart-Clip USB port" in phone connection field.
- Press "Search". Software should perform the following steps:
- SmartMoto detects S-Card;
- SmartMoto detects Smart-Clip;
- SmartMoto detects the handset and reads phone information.
- Log to bookmark "Flash".
- Press "Read language pack".
- Select the location for the file to be saved.
- Message "Reading language pack done" appears when the process is completed.
During Read Flash procedure - flash files will be created in safe mode ensuring quality flashing later. If there is a risk that firmware can’t be read safely, SmartMoto will not complete the Read Flash procedure
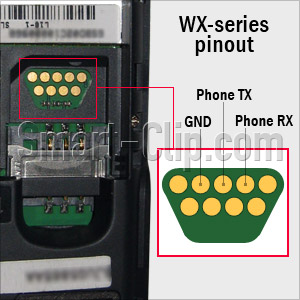
MTK models (Motorola WX, Alcatel and Vodafone) flashing manual
Please perform Calibration Backup before flashing procedure
- Connect S-Card to PC USB port and launch SmartMoto.
- Select "Computer COM ports" in Phone connection area.
- Log to the tab "MTK models"
- Connect* powered OFF phone to PC.
- Select an appropriate COM port in SmartMoto (usually is the highest number).
- Press "Write flash" and follow the instructions in the log window:
- Press and hold "Power ON" button on the phone
- As soon as SmartMoto shows an appropriate message in the log window, release "Power ON" button.
- SmartMoto reads phone information and Pop Ups window with the flash file request
- Choose appropriate flash file and press open
- Message "Flash Completed" indicates that flashing procedure completed successfully and handset can be disconnected.
Please perform Calibration Restore after flashing procedure
WX series backup instruction
WX160, WX161, WX180, WX181, WX260, WX265, WX280, WX288, WX290, WX295, WX345, WX390, WX395
- Connect S-Card to PC USB port and launch SmartMoto.
- Select "Computer COM ports" in Phone connection area.
- Log to the tab "MTK models"
- Connect* powered OFF phone to PC.
- Select an appropriate COM port in SmartMoto (usually is the highest number).
- Press "Backup phone flash" and follow the instructions in the log window.
- Press and hold "Power ON" button on the phone
- As soon as SmartMoto shows an appropriate message in the log window, release "Power ON" button.
- The message "Backup saved" informs that process completed successfully.
- Disconnect the handset.
* MTK models require to be connected to PC COM port via original COM data cable or using any COM port emulator.
IMEI repair on MTK models (Motorola WX, EX, Alcatel and Vodafone)
- Connect S-Card to PC USB port and launch SmartMoto.
- Select "Computer COM ports" in Phone connection area.
- Log to the tab "MTK models"
- Connect* powered OFF phone to PC.
- Select an appropriate COM port in SmartMoto (usually is the highest number).
- Enter IMEI number in the "Phone IMEI" field**
- Press "Restore IMEI" and follow the instructions in the log window.
- Press and hold "Power ON" button on the phone
- As soon as SmartMoto shows an appropriate message in the log window, release "Power ON" button.
- The message "Writing IMEI…OK" informs that process completed successfully.
- Disconnect the handset.
* MTK models require to be connected to PC COM port via original COM data cable or using any COM port emulator.
** Tick the "Work with secondary IMEI" mark to Restore Secondary IMEI.
Backup Flex for EX series
- Connect S-Card to PC USB port and launch SmartMoto.
- Select "Computer COM ports" in Phone connection area.
- Log to the tab "MTK models"
- Connect the phone to PC via original micro-USB cable
- Power On the phone & select COM-Port mode from handset's menu
- Install drivers for the phone (drivers for all phone models available at local PC in the
Program Files\GsmServer\SmartMoto\drivers\MTK USB Driver folder)
- After drivers get successfully installed, press "Refresh port list" in SmartMoto
- Select an appropriate COM port in SmartMoto (usually is the highest number)
- Press "Backup FLEX" button and choose location to save flex file.
- Message "Done. Restarting phone" indicates that backup procedure completed successfully, handset restarts and can be disconnected.
Restore Flex for EX series
- Connect S-Card to PC USB port and launch SmartMoto.
- Select "Computer COM ports" in Phone connection area.
- Log to the tab "MTK models"
- Connect the phone to PC via original micro-USB cable
- Power On the phone & select COM-Port mode from handset's menu
- Install drivers for the phone (drivers for all phone models available at local PC in the
Program Files\GsmServer\SmartMoto\drivers\MTK USB Driver folder)
- After drivers get successfully installed, press "Refresh port list" in SmartMoto
- Select an appropriate COM port in SmartMoto (usually is the highest number)
- Press "FLEX restore" button and select required flex file (in *.wxfx-format)
- Message "Done. Restarting phone" indicates that flashing procedure completed successfully, handset restarts and can be disconnected.
Backup Calibration for MTK-models
- Connect S-Card to PC USB port and launch SmartMoto.
- Select "Computer COM ports" in Phone connection area.
- Log to the tab "MTK models"
- Connect* powered OFF phone to PC.
- Select an appropriate COM port in SmartMoto (usually is the highest number).
- Press "Backup Calibration" button
- Press and hold "Power ON" button on the phone
- As soon as SmartMoto shows an appropriate message in the log window, release "Power ON" button
- Choose location to save calibration file (in *.wxcf format)
- Message "Reading flash Done" indicates that Calibration backup procedure has completed successfully
* MTK models require to be connected to PC COM port via original COM data cable or using any COM port emulator.
Restore calibration for MTK-models
- Connect S-Card to PC USB port and launch SmartMoto
- Select "Computer COM ports" in Phone connection area
- Log to the tab "MTK models"
- Power the phone On, wait till it fully power’s ON, and then power it OFF (Only if ‘Format FFS’ was just performed)
- Connect* powered OFF phone to PC.
- Select an appropriate COM port in SmartMoto (usually is the highest number).
- Press "Restore Calibration" button
- Press and hold "Power ON" button on the phone
- As soon as SmartMoto shows an appropriate message in the log window, release "Power ON" button
- Select required calibration file (in *.wxcf format)
- Message "Writing flash Done" indicates that Calibration restore procedure completed successfully
* MTK models require to be connected to PC COM port via original COM data cable or using any COM port emulator.
PC flash
PC-Flash option along with support of *.pcf flash files is fully moved from SmartMoto to the SCout software. Also, flashing of the I-mode and Compal based handsets is available on SCout. For more details, please visit official SCout web site.
Unbranding
If the phone model is supported and there is available an unbranded flash file or the model with unbranded firmware – the handset can be simply unbranded by flashing it with unbranded firmware.
Don't forget to restore the original security zone (Restore security area) after flashing with backup file if needed.
PDS zone problem description
Handset does not turn on, gets detected in SmartMoto, full flashing does not help. Possible problems: hardware or software.
SmartMoto can not fix any hardware problem
Software: Among the few reasons there could be corrupted PDS zone.
Similar to Flashing, "Repair PDS" can be performed only if the handset gets detected by SmartMoto.
"Repair PDS" option requires a constant Internet connection with Smart-Clip server. Internet settings must be the same as for Smart-Clip update.
- Connect handset to PC via Smart-Clip (
phone > USB cable > Smart-Clip > LPT cable > PC).
- Connect S-Card to PC USB port.
- Connect power supply to Smart-Clip and power on the handset.
- Launch SmartMoto.
- Choose "Smart-Clip USB port" in phone connection field.
- Press "Search". Software should perform the following steps:
- SmartMoto detects S-Card;
- SmartMoto detects Smart-Clip;
- SmartMoto detects the handset and reads phone information.
- Log to bookmark "Repair".
- Select the phone model from the scrolling list of supported for that operation models.
- Press "Repair PDS".
- Message "Please write a corresponding full_flash file to phone to accomplish repair" informs of successful complete of the first stage of the process.
- Log to bookmark "Flash".
- Press "Browse" to select an appropriate full_flash file.
- Press "Write flash".
- "Flash completed" message informs on finish of the repair process.
- Disconnect the handset, it’s ready for use.
After successful flashing is recommended to perform Master Reset and Master Clear procedure form the phone's menu.
WARNING
Before performing "Repair PDS" procedure, please make sure the model is included into the list and select it very carefully. In case if the model is not listed – do not perform repair procedure, otherwise it will seriously harm the handset. So, even restore of full original backup will not fix it.
For the phone models marked with asterisk (*), use a TestPoint connection method. Detailed description of TestPoint connection method is located at Unlock Manual section.
Section repair PDS has an option "Quick model find" for fast search of the model on the list. Selected model is marked by a triangle. Just enter phone model in "Quick model find" window and program will automatically find it in the list.
We strictly recommend making a full backup from the phone before performing a "Repair PDS" procedure.
Smart-Clip and repair of the handset with damaged flash chip
Quite frequently the Smart-Clip users are facing the problem of flash chip replacement (impossible to complete flashing due to some sectors damage, corrupted IMEI code, etc…). As before, we always recommended replacing it with the brand new one. And now we have tested another solution and found it 100% working. Good flash chip can de taken from the different not working handset, of the same model.
As soon as flash chip is replaced and a new (working) one installed properly, the following procedure has to be performed.
- Repair PDS.
- Flash with full_flash. The handset will not turn ON!
- Apply "IMEI repair firmware patch".
- Enter a correct 14 digit IMEI code & press "Restore IMEI" button.
NOTE
Repair PDS, flashing and IMEI repair procedures have to be performed in accordance to model instructions.
IMEI repair on W220, C168, C168i
- Connect* powered OFF phone to PC COM port.
- Launch SmartMoto.
- Select "Computer COM ports" in Phone connection window.
- Log to "Restore IMEI" tab.
- Select an appropriate COM port in SmartMoto.
- Chose correct model from the list.
- Enter 14 digit IMEI code to be restored
- Press "Restore IMEI".
- Press "Power ON" button on the phone, as soon as SmartMoto indicates an appropriate message.
- Process completed.
*Chi Mei models require to be connected to PC COM port via original COM data cable or using any COM port emulator.
Disclaimer
IMEI section of SmartMoto service software was implemented by developer of this program for repair (original IMEI restore) purposes only!
For some models IMEI could be restored simply by connecting the handset to SmartMoto via Smart-Clip as for flashing.
Some models require to be flashed with "IMEI repair firmware patch", only after that IMEI could be restored.
In some cases flash chip on phone’s PCB requires to be replaced, to allow user to restore IMEI.
However, every user that applies to this option must remember the original IMEI to be able to restore it.
In any case if SmartMoto user, during phone repair process, applies IMEI that differs from the original IMEI, which was previously set with the phone, is doing that on his own responsibility.
Developer of SmartMoto software does not take any responsibility for any incorrect use of that program.
Frequency band switching
- Connect handset to PC via Smart-Clip (
phone > USB cable > Smart-Clip > LPT cable > PC).
- Connect S-Card to PC USB port.
- Connect power supply to Smart-Clip and power on the handset.
- Launch SmartMoto.
- Choose "Smart-Clip USB port" in phone connection field.
- Press "Search". Software should perform the following steps:
- SmartMoto detects S-Card;
- SmartMoto detects Smart-Clip;
- SmartMoto detects the handset and reads phone information.
- Log to bookmark "Service".
- Select a required value in "Operation band" field.
- Press "Update band".
- Disconnect the handset, after the process is completed.
- The phone is set to the new operation band.
Note
Reset of the phone frequency is possible only if the handset hardware allows to do so. It might happen that the process of band changing was successfully completed but after switching the phone off and turning it back on, the band automatically changes to the default one. This means that phone’s hardware does not support customer settings.
Other service options
Listed below options can not be used with the phone in flash mode. The handset must me turned ON.
Activate phone "Java App Loader" option – activates the Java applet in the phone menu.
Reset phone Life Timer - returns phone life timer back to "0" (zero).
Master Reset - resets all customer settings to default factory settings.
Master Clear - clears all customer data.
Enable Unicode – option allows setting the phone to receive SMS in Unicode.
Set subsidy code to "00000000" – after connecting the phone, using a "TestPoint connection" method and flashing with a branded flash file, the handset may require a subsidy code to be entered. It is recommended to set the code value to "00000000" (eight times zero) before actual flashing – thus the user will be able to enter it when the SIM-card is inserted into the phone. If the code has not been reset to "00000000" (eight times zero) the handset will require unlock procedure to be performed in this case.
Battery settings – for best phone performance is recommended to create backup of the battery settings before performing a flash operation and restore them after completing the flash.
Boost mode
The flashing speed can be increased up to 20% simply by logging to Smart-Clip bookmark of SmartMoto service software and selecting "Boost mode" option.
- Connect the handset to PC via Smart-Clip (phone > USB cable > Smart-Clip > LPT cable > PC).
- Connect S-Card to PC USB port.
- Connect power supply to Smart-Clip and power on the handset.
- Launch SmartMoto.
- Choose "Smart-Clip USB port" in phone connection window.
- Log to bookmark “Smart-Clip”.
- Mark “Boost mode” option.
- Press “Connect” button to establish an increased speed mode connection between Smart-Clip and SmartMoto.
- Press "Search". Software should perform the following steps:
- SmartMoto detects S-Card;
- SmartMoto detects Smart-Clip;
- SmartMoto detects the handset and reads all information.
- The handset is ready for Flash operation in “Boost mode”.
After successful flashing is recommended to perform Master Reset and Master Clear procedure form the phone's menu.
SmartMoto & phone unlocking
Use of SmartMoto is required for unlock process if the phone boot version is: 6.12, 6.31, 6.36, 6.71, 6.82, 8.26, 8.A0, 8.A1, 8.D0, A.02, A.30 and higher.
Detailed description of "Remove RSA" and "Unlock via TestPoint" procedure is located at Unlock manual section.
Format FFS
Format FFS - resets all settings (including user code) to default value. Similar to "Master Reset" /"Master Clear" function for P2K models.
Please perform Calibration Backup before flashing procedure (for MTK models only)
- Connect* powered OFF phone to PC COM port.
- Launch SmartMoto.
- Select "Computer COM ports" in Phone connection window.
- Log to "Compal/MTK" tab.
- Select an appropriate COM port in SmartMoto.
- Press "Format FFS" button.
- Press "Power ON" button on the phone, as soon as SmartMoto indicates an appropriate message.
- SmartMoto resets settings to default value.
Please perform Calibration Restore after flashing procedure (for MTK models only)
* Compal/MTK models require to be connected to PC COM port via original COM data cable or using any COM port emulator.
Repair EEPROM
Repair EEPROM - recalculates EEPROM (similar to Repair PDS in P2K models). Should be used for the handsets that don't power on after flashing or for the units with "Phone hacked" issue.
- Connect* powered OFF phone to PC COM port.
- Launch SmartMoto.
- Select "Computer COM ports" in Phone connection window.
- Log to "Compal" tab.
- Select an appropriate COM port in SmartMoto.
- For repair purposes, please make sure that "Use default EEPROM" option is marked.
- Press "Repair EEPROM" button.
- Press "Power ON" button on the phone, as soon as SmartMoto indicates an appropriate message.
- SmartMoto recalculates EEPROM.
* Compal models require to be connected to PC COM port via original COM data cable or using any COM port emulator.
|


